Reverse That Slump In Your Shoulders With These Yoga Poses
Are you getting slumped shoulders from hunching over your computer at work or from spending hours staring down at your cell phone?
To be happy and thrive in life and in your yoga practice it helps to be pain free and having a slump in your shoulders can be painful. If you are like me though this means reversing a downward slouching trend. Many of us sit in an office working at computers, type away on our cell phones (which I am literally doing at this moment while traveling), or some other 'arms in front of you' type of work.
In years gone by I've described my posture as that of a boiled shrimp. This may have been a slight exaggeration, but not much! I've been working on all kinds of things to correct this and I think I'm in the final stages. My shoulders are now improved but still slouchy.

Typically if a muscle feels tight, say your hamstrings or calves, you stretch them to make them feel better. With upper back pain it seems we need to stretch our upper backs, and this may be true, but we really need to stretch the muscles in the chest that are pulling your shoulders down and forward in the first place. You can stretch and massage your upper back too, but to fix the cause of the pain and the slump, you'll really need to focus on the chest. In the event you'd like to know, it's primarily 3 chest/arm muscles wreaking this havoc. the brachialis, the corachobrachialis and the pectoralalis minor. The primary culprit is the pectoralis minor.
Adding these stretches to your day or your yoga routine will help relieve and begin to reverse upper back strain and pain.
Step 1: Massage
Massage your upper chest a bit to loosen and relax those 3 tight muscles.
Step 2: Arms Behind the Back
Bring your arms back behind you and clasp your hands in a way that your fingers are intertwined but your palms are not touching. Now keep your shoulders down and do not strain to straighten your arms. Your goal is to bring your arms up (still slightly or mostly bent) and bring your elbows closer together. You don't want your elbows to wing out.

Step 3: Cobra
Here I demonstrate two variations of cobra. One is for beginers and the second image is just a bit more advanced. For the more advanced variation, your arms will stretch behind you (with elbows bent unless there is no strain your your shoulder). If you choose you can also hold your feet up in the air. Hold this pose for 30 seconds or a minute and breathe. It is a lighter one but will becomes more intense as you hold it.


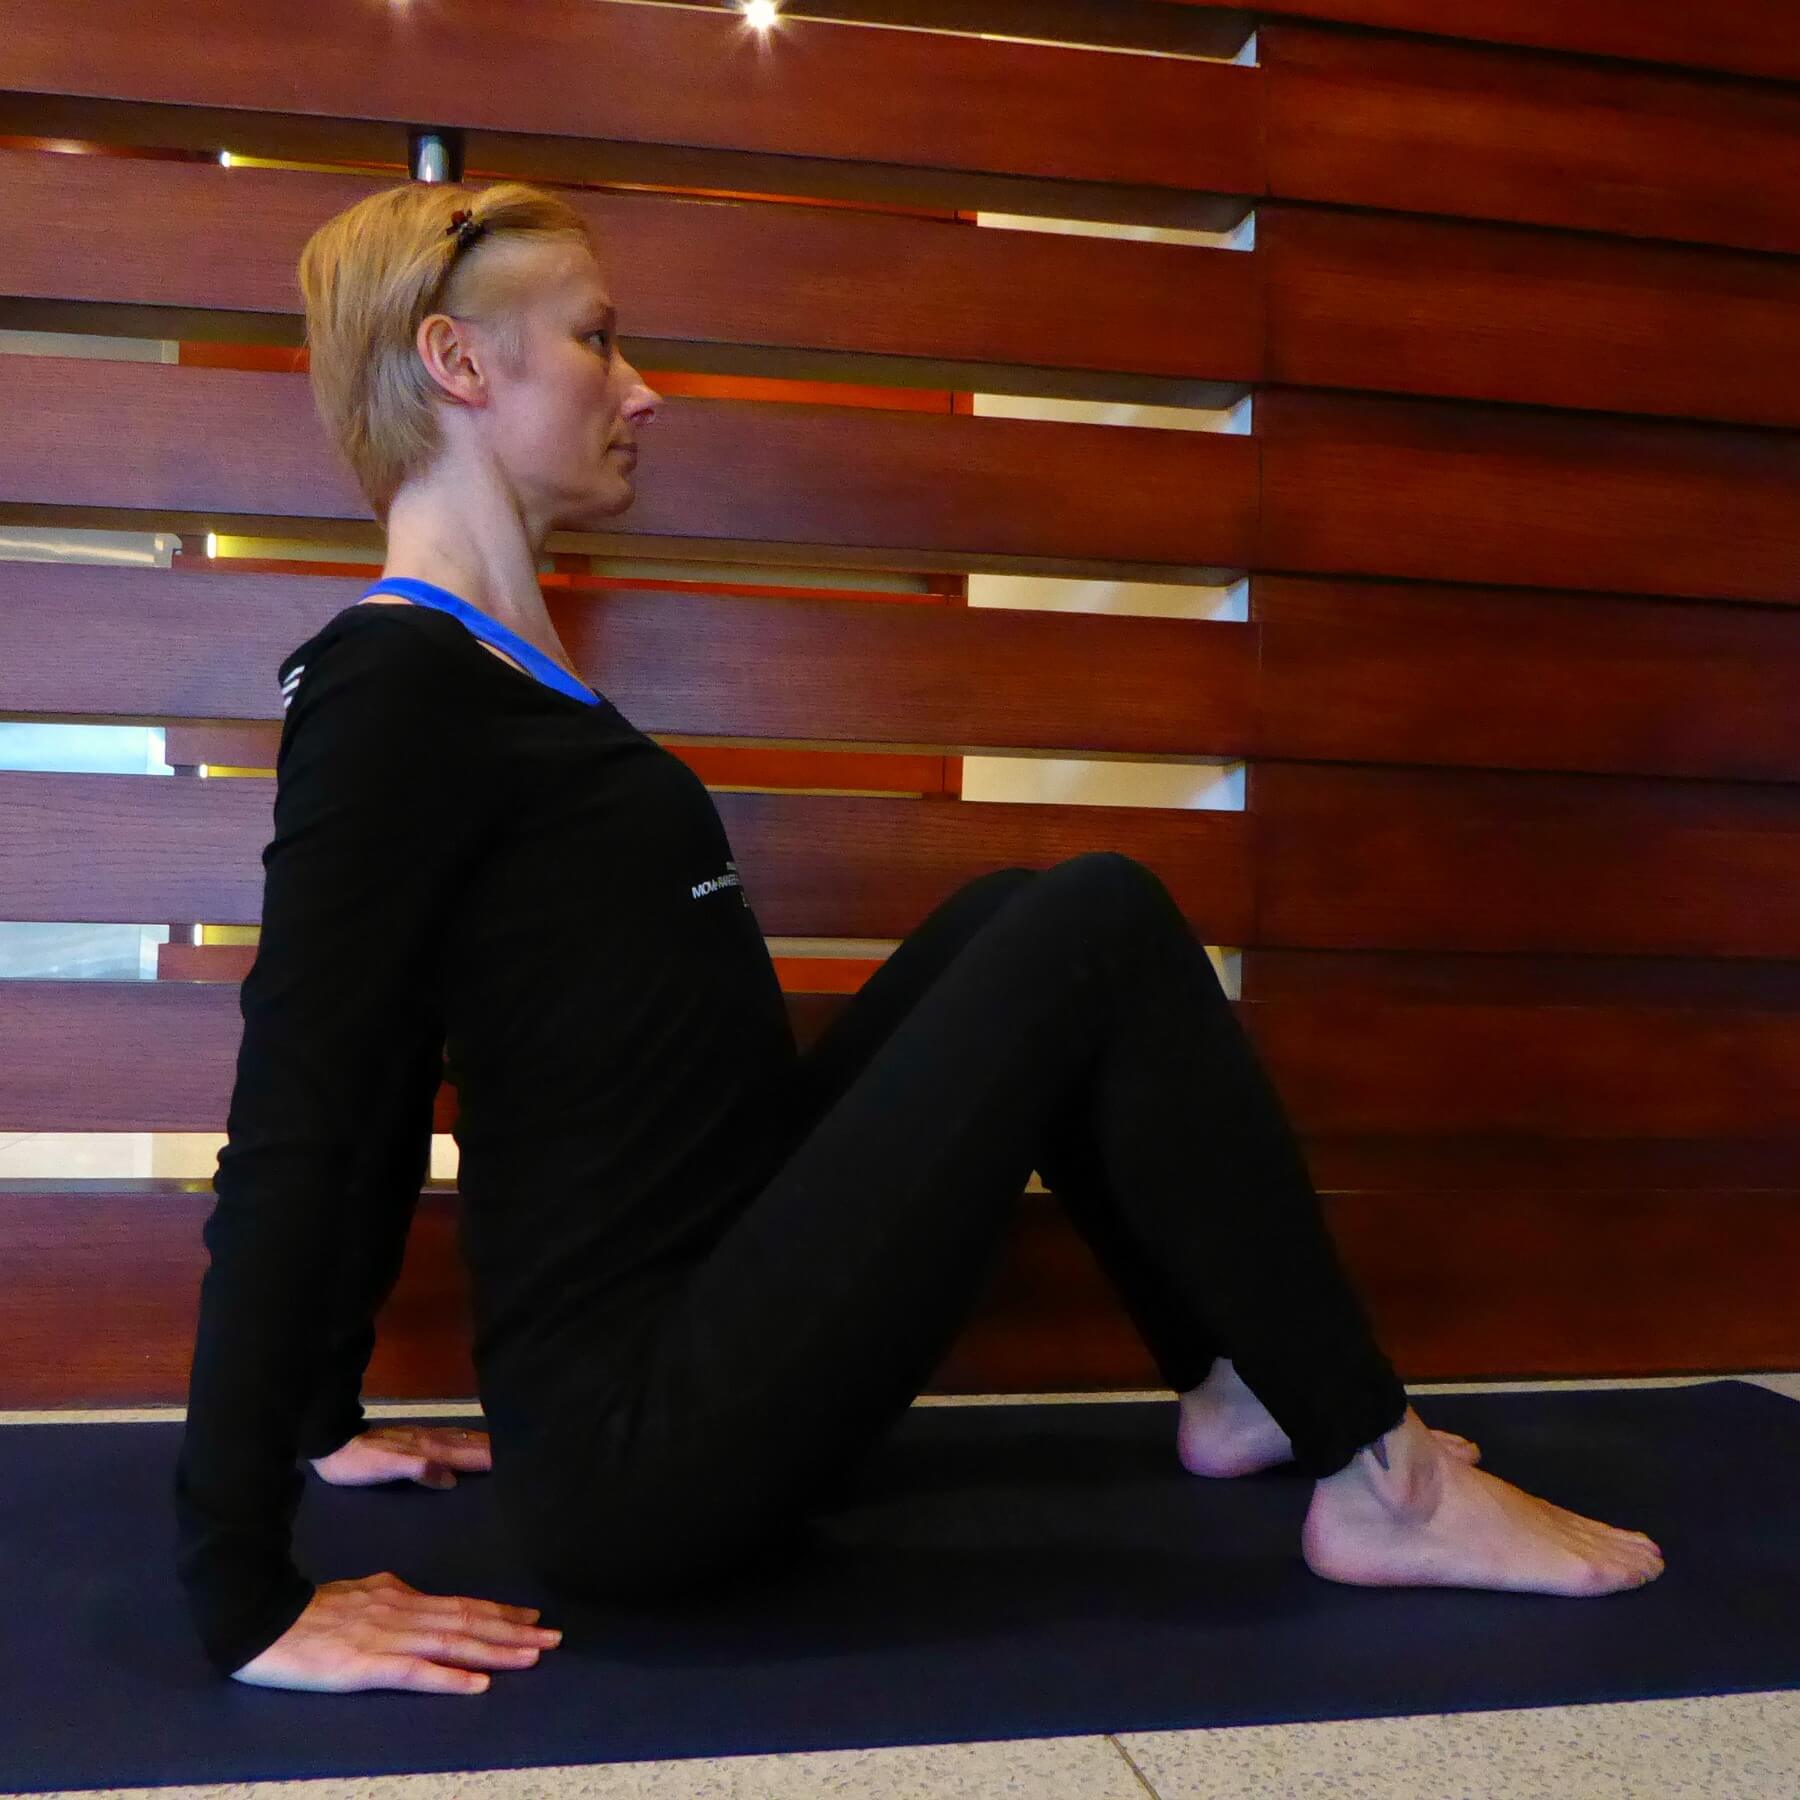
Step 4: Crab & Pre-Crab Pose
In the beginner variation you want to sit with your feet firmly on the mat, knees bent, arms alongside your hips and positioned so they are in a vertical line from shoulder to wrist. Hands will be turned to point toward your feed. Now arch your back and if you are like me you will begin to feel a strong pull on those pectoral muscles. For a more advanced version you can slowly begin to bring yourself to a tabletop type of position by raising your rear off the ground. Be mindful that your shoulders to wrists and knees to ankles stay in a vertical line. You'll see I'm not too far off, but could have used a bit of straightening!

Step 5: Staff or Upward Plank Pose
For this pose you want to begin in a similar position to that of beginner crab pose but have your legs out straighter. Do not extend them all the way until you ensure you are ready. Again, you are looking for your shoulders to be in a vertical line with your wrists.

Step 6: Standing Shoulder Twist
This is a great pose to get your shoulders in shape to do other yoga poses without harm to your shoulder. In this pose you want to stand perpendicular (not facing the wall but turned so one arm is an arm distance away), then place your hand on the wall so your arm is straight out and fingers are pointing behind you a bit. Ensure your thumb is facing upright. Now begin twisting your torso away from the wall. This is a great shot of my ear, but you can also get a decent view of how I have my arm straight off a relaxed shoulder I have turned to begin facing away from the wall. You may feel a tingling, and this is ok! Just don't turn too much too hard! Go right to edge and don't go over it!

How is that tightness feeling now? A bit better like mine? Try this for 7 days and let me know how you feel a difference!
I learned a lot from this article in particular, so thank you Doug Keller and Yoga International. For more detailed information in his article, Click here. Mark from Posture Direct was also helpful for how to spot and relieve and massage rounded shoulders. Check out his article, Click here.
Did you enjoy this post and find it helpful? Please like, share and feel free to re-post!